Sunday, December 30, 2012

Photo: Christmas tree, Movenpick hotel, Cairo, Egypt

Via Flickr:
Those shoots was taken when I was attending my company closing event at Movenpick hotel, Cairo, Egypt.
Photo: Movenpick hotel entrance, Cairo, Egypt

Via Flickr:
Those shoots was taken when I was attending my company closing event at Movenpick hotel, Cairo, Egypt.
Wednesday, December 26, 2012
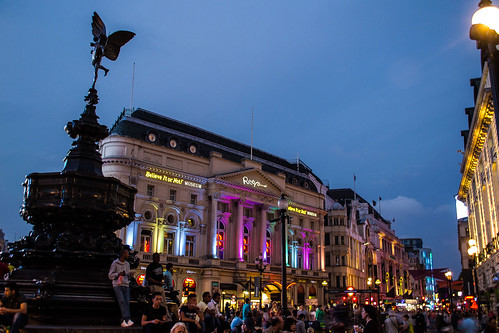
Photo: Regents street restaurant, London, UK

Via Flickr:
This shoot I have took when I as was passing by a restaurant in my way to Apple store in Regents street, London, UK.
Wednesday, December 12, 2012
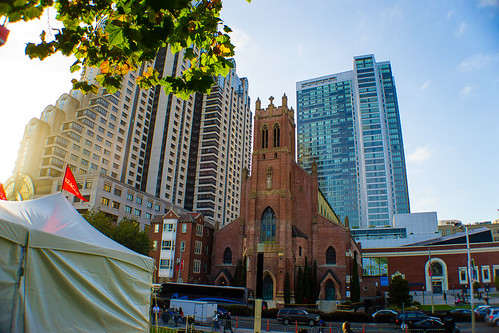
Photo: San Francisco, Apple Store

Via Flickr:
California, San Francisco, USA. 2012 Trip
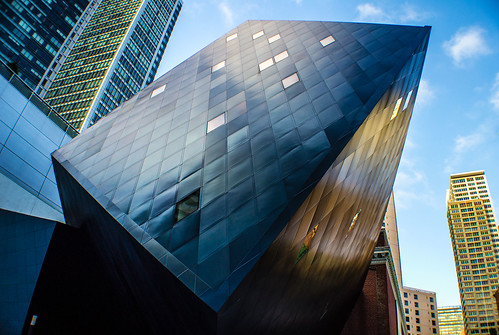
Photo: San Francisco, Front of Yerba Buena Garden
Via Flickr:
California, San Francisco, USA. 2012 Trip
Photo: San Francisco, Yerba Buena Garden
Via Flickr:
California, San Francisco, USA. 2012 Trip
Photo: San Francisco, Yerpa Buena Center
Via Flickr:
California, San Francisco, USA. 2012 Trip
Photo: San Francisco, Yerba Buena
Via Flickr:
California, San Francisco, USA. 2012 Trip
Monday, December 3, 2012

Thursday, November 15, 2012
Photo: Lonely tree
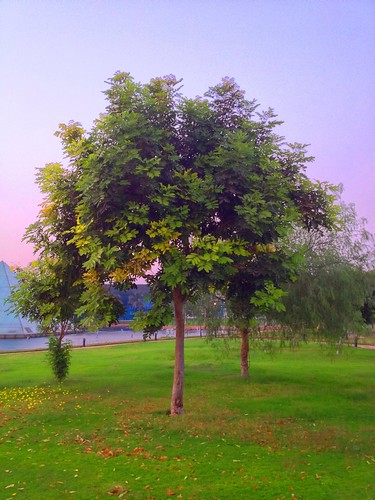
This photo was taken in my working place at smart village for its restaurant surrounding , it was taken by my iphone 4s.
Photo: Smart Village Restaurant, Cairo. Egypt.
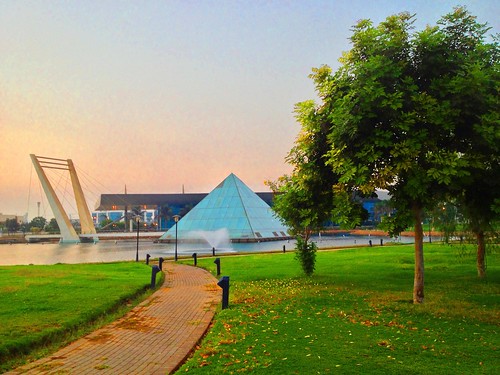
This photo was taken in my working place at smart village for its restaurant, it was taken by my iphone 4s.
Thursday, November 1, 2012
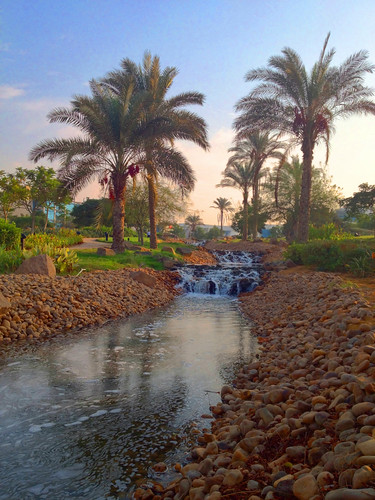
Photo: Water falls rock

Via Flickr:
This shoot has been taken while I was yesterday practicing my walking course at my work smart village
Friday, October 26, 2012
Photo: Soho Square, London, United Kingdom @ noon
Via Flickr:
This shoot was taken to Soho Square, London, United Kingdom, at noon, when I was walking around then I decided to go toward Regent street.
Saturday, October 20, 2012
Photo: Alamo buildings
This photo was taken when i was in Alamo Square, San Francisco, California, USA.
Saturday, October 6, 2012
Photo: London Eye at Night, Westminster, UK
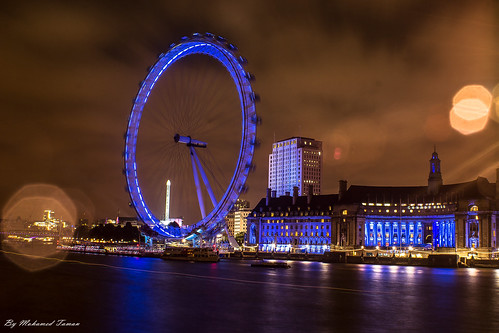
Via Flickr:
London Eye at Night, shoot taken when i was in London for a vacation.
Sunday, September 23, 2012
Photo: Big Ben City of Westminster, UK
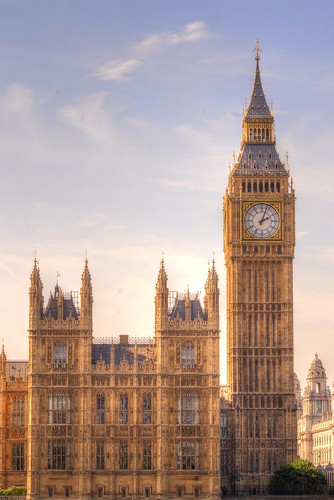
Via Flickr:
This shoot was taken when i was in London, UK trip.
Photo: Parliament Palace, City of Westminster, UK
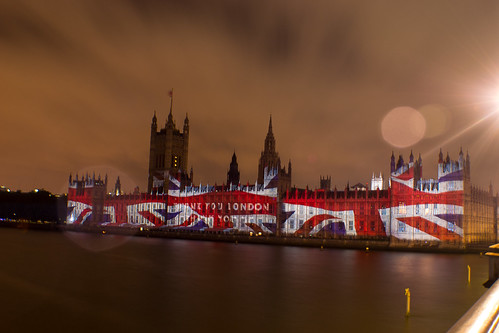
Via Flickr:
This Shoot was taken to Parliament palace, from River Thames on the other side when there was a celebration for paralympic in London, and they project some slides on parliament house.
Friday, August 17, 2012
Article: Buying Your First Lens
Other Nikon models, including the Nikon D300, D700, and D3/D3x, are generally purchased without a lens by veteran Nikon photographers who already have a complement of optics to use with their cameras.
I bought my D3100 with the 18-55mm VR lens, even though I already had now a (large) collection of lenses, because the VR was an attractive feature, and the lens is perfect to mount on the camera. Depending on which category of photographer you fall into, you’ll need to make a decision about what kit lens to BUY, or decide what other kind of lenses you need to fill out your complement of Nikon optics. Here I will cover “first lens” concerns.
When deciding on a first lens, there are several factors you’ll want to consider:
- Cost. You might have stretched your budget a bit to purchase your Nikon D3100, so the 18-55mm VR kit lens helps you keep the cost of your first lens fairly low. In addition, there are excellent moderately priced lenses available that will add from $100 to $300 to the price of your camera if purchased at the same time.
- Zoom range. If you have only one lens, you’ll want a fairly long zoom range to provide as much flexibility as possible. Fortunately, several popular basic lenses for the D3100 have 3X to 5.8X zoom ranges, extending from moderate wide-angle/normal out to medium telephoto. Either is fine for everyday shooting, portraits, and some types of sports. for my I have "Sigma 70-300mm f/4-5.6 DG APO Macro Telephoto Zoom Lens".
- Adequate maximum aperture. You’ll want an f/stop of at least f/3.5 to f/4 for shooting under fairly low light conditions. The thing to watch for is the maximum aperture when the lens is zoomed to its telephoto end. You may end up with no better than an f/5.6 maximum aperture. That’s not great, but you can often live with it, particularly with a lens having vibration reduction (VR) capabilities, because you can often shoot at lower shutter speeds to compensate for the limited maximum aperture.
- Image quality. Your starter lens should have good image quality, because that’s one of the primary factors that will be used to judge your photos. Even at a low price, several of the different lenses that can be used with the D3100 kit include extra-low dispersion glass and aspherical elements that minimize distortion and chromatic aberration; they are sharp enough for most applications. If you read the user evaluations in the online photography forums, you know that owners of the kit lenses have been very pleased with its image quality.
- Size matters. A good walking-around lens is compact in size and light in weight.
- Fast/close focusing. Your first lens should have a speedy autofocus system (which is where the Silent Wave motor found in all but the bargain basement lenses [older, non-AF-S models] is an advantage). Close focusing (to 12 inches or closer) will let you use your basic lens for some types of macro photography.
Friday, July 27, 2012
Article: Working with digital SLR Lenses
Other than the sensor itself, the lens you choose for your dSLR is the most important component in determining image quality and perspective of your images.
Sensor Sensibilities
------------------------
From time to time, you’ve heard the term crop factor, and you’ve probably also heard the term lens multiplier factor. Both are misleading and inaccurate terms used to describe the same phenomenon: the fact that cameras like the D3100 (and most other affordable digital SLRs) provide a field of view that’s smaller and narrower than that produced by certain other (usually much more expensive) cameras, when fitted with exactly the same lens.
Figure 1 quite clearly shows the phenomenon at work. The outer rectangle, marked 1X, shows the field of view you might expect with a 28mm lens mounted on one of Nikon’s “full-frame” (non-cropped) cameras, like the Nikon D700, D3, or D3x. The area marked 1.5X shows the field of view you’d get with that 28mm lens installed on a D3100. It’s easy to see from the illustration that the 1X rendition provides a wider, more expansive view, while the inner field of view is, in comparison, cropped.
 |
Figure 1: Nikon offers digital SLRs with full-frame (1X) crops, as well as 1.5X crops. |
The cropping effect is produced because the sensors of DX cameras like the Nikon D3100 are smaller than the sensors of the D700, D3, or D3x. The “full-frame” camera has a sensor that’s the size of the standard 35mm film frame, 24mm × 36mm.
Your D3100’s sensor does not measure 24mm X 36mm; instead, it specs out at 23.6 × 15.8 mm, or about 66.7 percent of the area of a full-frame sensor, as shown by the red boxes in the figure.
You can calculate the relative field of view by dividing the focal length of the lens by .667. Thus, a 100mm lens mounted on a D3100 has the same field of view as a 150mm lens on the Nikon D700.
We humans tend to perform multiplication operations in our heads more easily than division, so such field of view comparisons are usually calculated using the reciprocal of .667—1.5—so we can multiply instead. (100 / .667=150; 100 × 1.5=150.)
This translation is generally useful only if you’re accustomed to using full-frame cameras (usually of the film variety) and want to know how a familiar lens will perform on a digital camera.
I strongly prefer crop factor over lens multiplier, because nothing is being multiplied; a 100mm lens doesn’t “become” a 150mm lens—the depth-of-field and lens aperture remain the same. Only the field of view is cropped. But crop factor isn’t much better, as it implies that the 24 × 36mm frame is “full” and anything else is “less.”
If you’re accustomed to using full-frame film cameras, you might find it helpful to use the crop factor “multiplier” to translate a lens’s real focal length into the full-frame equivalent, even though, as I said, nothing is actually being multiplied.
Crop or Not?
------------------
There's a lot of debate over the "advantages" and "disadvantages" of using a camera with a ?"cropped" sensor, versus one with a ?"full-frame" sensor. The arguments go like these:
- "Free" 1.5X teleconverter.
The Nikon D3100 (and other cameras with the 1.5X crop factor) magically transforms any telephoto lens you have into a longer lens, which can be useful for sports, wildlife photography, and other endeavors that benefit from more reach. Yet, your f/stop remains the same (that is, a 300mm f/4 becomes a very fast 450mm f/4 lens). Some discount this advantage, pointing out that the exact same field of view can be had by taking a full-frame image, and trimming it to the 1.5X equivalent. While that is strictly true, it doesn't take into account a factor called pixel density. Nikon manufactures both full-frame and cropped sensor cameras with 12MP of resolution (the Nikon D700 and D5000, for example).
The cropped model packs all those pixels together much more tightly, into that 23.6 ?~ 15.8mm area. So, your 300mm f/4 lens delivers the same field of view as a 450mm optic at the camera's full 12MP resolution. When you crop the D700 image to get the same field of view, you're using only five megapixels worth of resolution. So, while both images will be framed the same, the cropped sensor version, with its higher pixel density, will be sharper.
- Dense pixels=more noise.
The other side of the pixel density coin is that the denser packing of pixels to achieve 14.2 megapixels in the D3100 sensor means that each pixel must be smaller, and will have less light-gathering capabilities. Larger pixels capture light more efficiently, reducing the need to amplify the signal when boosting ISO sensitivity, and, therefore, producing less noise. In an absolute sense, this is true, and cameras like the D700 and D3 do have sensational high-ISO performance. However, the D3100’s sensor is improved over earlier cameras (for one thing, it is a high-sensitivity CMOS sensor, rather than a noisier CCD sensor like that found in some earlier Nikon entry-level cameras), so you’ll find it performs very well at higher ISOs. Indeed, its ISO sensitivity is more or less comparable to that of the Nikon D3x, which also relies on high-density pixel-packing to achieve its 24.5MP resolution. You needn’t hesitate to use ISO 1600 (or even higher) with the Nikon D3100: just don’t expect the same results at H1 or H2 (ISO 6400 and 12800 equivalent) as D700 owners get from their cameras.
- Lack of wide-angle perspective.
Of course, the 1.5X “crop” factor applies to wide angle lenses, too, so your 20mm ultra-wide lens becomes a hum-drum 30mm near wide-angle and a 35mm focal length is transformed into what photographers call a “normal” lens. Zoom lenses, like the 18-105mm lens that is often purchased with the Nikon cameras in a kit, have less wide-angle perspective at their minimum focal length. The 18-105mm optic, for example, is the equivalent of a 27mm moderate wide angle when zoomed to its widest setting. Nikon has “fixed” this problem by providing several different extra-wide zooms specifically for the DX format, including the (relatively) affordable 12-24mm f/4 DX Nikkor. You’ll never really lack for wide-angle lenses, but some of us will need to buy wider optics to regain the expansive view we’re looking for.
- Mixed body mix-up.
The relatively small number of Nikon D3100 owners who also have a Nikon full-frame camera like the D700 can’t ignore the focal-length mix-up factor. If you own both FX and DX-format cameras (some D3100 owners use them as a backup to a D700, for example), it’s vexing to have to adjust to the different fields of view that the cameras provide. If you remove a given lens from one camera and put it on the other, the effective focal length/field of view changes. That 17-35mm f/2.8 zoom works as an ultra-wide to wide angle on a D700, but functions more as a moderate wide-angle to normal lens on a D3100. To get the “look” on both cameras, you’d need to use a 12-24mm zoom on the D3100, and the 17-35mm zoom on the D700. It’s possible to become accustomed to this field of view shake-up and, indeed, some photographers put it to work by mounting their longest telephoto lens on the D3100 and their wide-angle lenses on their full-frame camera. Even if you’ve never owned both an FX and DX camera, you should be aware of the possible confusion.
References:
-----------------------
Cengage David Buschs Nikon D3100 Guide to Digital SLR Photography 2011 ebook.
Tuesday, July 17, 2012
Article: Working with Long Exposures (Long Exposure)
Here we will talk about long exposure, what is it? How we can control it? And what we can do with long exposure.
First let's start with what is long exposure.
Long Exposures
-------------------
Longer exposures are a doorway into another world, showing us how even familiar scenes can look much different when photographed over periods measured in seconds.
At night, long exposures produce streaks of light from moving, illuminated subjects like automobiles or amusement park rides.
Extra-long exposures of seemingly pitch-dark subjects can reveal interesting views using light levels barely bright enough to see by.
At any time of day, including daytime (in which case you’ll often need the help of neutral density filters to make the long exposure practical), long exposures can cause moving objects to vanish entirely, because they don’t remain stationary long enough to register in a photograph.
Three Ways to Take Long Exposures
--------------------------------------------
There are actually three common types of lengthy exposures: timed exposures, bulb exposures, and time exposures. The Nikon D3100 offers only the first two. Because of the length of the exposure, all shots with very slow shutter speeds should be taken with a tripod to hold the camera steady.
- Timed exposures.
These are long exposures from 1 second to 30 seconds, measured by the camera itself. To take a picture in this range, simply use Manual or S modes and use the main command dial to set the shutter speed to the length of time you want, choosing from preset speeds of 1.0, 1.3, 1.6, 2.0, 2.5, 3.0, 4.0, 5.0, 6.0, 8.0, 10.0, 13.0, 15.0, 20.0, 25.0, and 30.0 seconds (because the D3100 uses 1/3 stop increments).
- Pros. of timed exposures is that the camera does all the calculating for you. There's no need for a stopwatch. If you review your image on the LCD and decide to try again with the exposure doubled or halved, you can dial in the correct exposure with precision.
- Cons. of timed exposures is that you can't take a photo for longer than 30 seconds.
- Pros. of timed exposures is that the camera does all the calculating for you. There's no need for a stopwatch. If you review your image on the LCD and decide to try again with the exposure doubled or halved, you can dial in the correct exposure with precision.
- Bulb exposures.
This type of exposure is so-called because in the olden days the photographer squeezed and held an air bulb attached to a tube that provided the force necessary to keep the shutter open. Traditionally, a bulb exposure is one that lasts as long as the shutter release button is pressed; when you release the button, the exposure ends.
To make a bulb exposure with the D3100, set the camera on Manual mode, set the f/stop, and then use the main command dial to select the shutter speed immediately after 30 seconds--Bulb. Then, press the shutter to start the exposure, and release it again to close the shutter.
- Time exposures.
This is a setting found on some cameras to produce longer exposures. With cameras that implement this option, the shutter opens when you press the shutter release button, and remains open until you press the button again. With the Nikon D3100, you can't get this exact effect; the best you can do is use a Bulb exposure.
Working with Long Exposures:
------------------------------------
Because the D3100 produces such good images at longer exposures, and there are so many creative things you can do with long-exposure techniques, you'll want to do some experimenting. Get yourself a tripod or another firm support and take some test shots with long exposure noise reduction both enabled and disabled (to see whether you prefer low noise or high detail) and get started. Here are some things to try:
- Make people invisible.
One very cool thing about long exposures is that objects that move rapidly enough won't register at all in a photograph, while the subjects that remain stationary are portrayed in the normal way. That makes it easy to produce people-free landscape photos and architectural photos at night or, even, in full daylight if you use a plain gray neutral-density filter (or two or three) to allow an exposure of at least a few seconds. At ISO 100, f/22, and a pair of ND8 neutral density filters (which each remove three stops' worth of light -- giving you, in effect, the equivalent of ISO 1.5!), you can use exposures of nearly two seconds; overcast days and/or even more neutral-density filtration would work even better if daylight people-vanishing is your goal. They'll have to be walking very briskly and across the field of view (rather than directly toward the camera) for this to work. At night, it's much easier to achieve this effect with the 20- to 30-second exposures that are possible, as you can see in Figures 1 and 2.

Figure 1: This alleyway is thronged with people, as you can see in this
two-second exposure using only the available illumination.

Figure 2: With the camera still on a tripod, a 30-second
exposure rendered the passersby almost invisible.
- Create streaks.
If you aren't shooting for total invisibility, long exposures with the camera on a tripod can produce some interesting streaky effects. Even a single ND8 filter will let you shoot at f/22 and 1/6th second in daylight. Figure 3 shows one kind of effect you can get indoors, without the need for a special filter.

Figure 3: This Korean dancer produced a swirl of color as she
spun during the 1/4th second exposure.
- Produce light trails.
At night, car headlights and taillights and other moving sources of illumination can generate interesting light trails. If the lights aren’t moving, you can make them move by zooming or jiggling the camera during a long exposure. Your camera doesn’t even need to be mounted on a tripod; hand-holding the D3100 for longer exposures adds movement and patterns to your trails. If you’re shooting fireworks, a longer exposure may allow you to combine several bursts into one picture (see Figure 4).

Figure 4: A long exposure allows capturing several bursts of fireworks in one image.
- Blur waterfalls, etc.
You’ll find that waterfalls and other sources of moving liquid produce a special type of long-exposure blur, because the water merges into a fantasy-like veil that looks different at different exposure times, and with different waterfalls. Cascades with turbulent flow produce a rougher look at a given longer exposure than falls that flow smoothly. Although blurred waterfalls have become almost a cliché, there are still plenty of variations for a creative photographer to explore.
- Show total darkness in new ways.
Even on the darkest, moonless nights, there is enough starlight or glow from distant illumination sources to see by, and, if you use a long exposure, there is enough light to take a picture, too.


Friday, July 13, 2012
Article: Working with Short Exposures (A Tiny Slice of Time)
Exposures that seem impossibly brief can reveal a world we didn’t know existed. In the 1930s, Dr. Harold Edgerton, a professor of electrical engineering at MIT,
pioneered high-speed photography using a repeating electronic flash unit he patented called the stroboscope.
As the inventor of the electronic flash, he popularized its use to freeze objects in motion, and you’ve probably seen his photographs of bullets piercing balloons and drops of milk forming a coronet-shaped splash.
Electronic flash freezes action by virtue of its extremely short duration—as brief as 1/50,000th second or less.
Although the D3100’s built-in flash unit can give you these ultra-quick glimpses of moving subjects, an external flash, such as one of the Nikon speedlights, offers even more versatility.
Of course, the D3100 is fully capable of immobilizing all but the fastest movement using only its shutter speeds, which range all the way up to a respectably quick 1/4,000th second. Indeed, you’ll rarely have need for such a brief shutter speed in ordinary shooting.
If you wanted to use an aperture of f/1.8 at ISO 200 outdoors in bright sunlight, for some reason, a shutter speed of 1/4,000th second would more than do the job.
You’d need a faster shutter speed only if you moved the ISO setting to a higher sensitivity, say, to compensate for a polarizing filter you attached to your lens. Under less than full sunlight, 1/4,000th second is more than fast enough for any conditions you’re likely to encounter.
Most sports action can be frozen at 1/2,000th second or slower, and for many sports a slower shutter speed is actually preferable—for example, to allow the wheels of a racing automobile or motorcycle, or the propeller on a classic aircraft to blur realistically.
If you want to do some exotic action-freezing photography, you can use the Nikon D3100’s faster shutter speeds, or resort to an electronic flash (internal or external), which provides the effect of a high shutter speed because of its short duration.
Of course, you’ll need a lot of light. High shutter speeds cut very fine slices of time and sharply reduce the amount of illumination that reaches your sensor.
To use 1/4,000th second at an aperture of f/6.3, you’d need an ISO setting of 800—even in full daylight.
To use an f/stop smaller than f/6.3 or an ISO setting lower than 1600, you’d need more light than full daylight provides. (That’s why electronic flash units work
so well for high-speed photography when used as the sole illumination; they provide both the effect of a brief shutter speed and the high levels of illumination needed.)
High shutter speeds with electronic flash comes with a penalty: you have to use a shutter speed slower than 1/200th second. Perhaps you want to stop some action in
daylight with a brief shutter speed and use electronic flash only as supplemental illumination to fill in the shadows.
Unfortunately, under most conditions you can’t use flash with your D3100 at any shutter speed faster than 1/200th second. That’s the fastest speed at which the camera’s focal plane shutter is fully open: at shorter speeds, the “slit” (described in more detail in Chapter 8) comes into play, so that the flash will expose only the small portion of the sensor exposed by the slit during its duration.
Working with Short Exposures
--------------------------------------
You can have a lot of fun exploring the kinds of pictures you can take using very brief exposure times, whether you decide to take advantage of the action-stopping capabilities of your built-in or external electronic flash or work with the Nikon D3100’s faster shutter speeds.
Here are a few ideas to get you started:
------------------------------------------------
- Take revealing images.
Fast shutter speeds can help you reveal the real subject behind the façade, by freezing constant motion to capture an enlightening moment in time.
Legendary fashion/portrait photographer Philippe Halsman used leaping photos of famous people, such as the Duke and Duchess of Windsor, Richard Nixon, and Salvador Dali to illuminate their real selves. Halsman said, “When you ask a person to jump, his attention is mostly directed toward the act of jumping and the mask falls so that the real person appears.” Try some high-speed portraits of people you know in motion to see how they appear when concentrating on something other than the portrait.
- Create unreal images.
High-speed photography can also produce photographs that show your subjects in ways that are quite unreal. A helicopter in mid-air with its rotors frozen or a motocross cyclist leaping over a ramp, but with all motion stopped so that the rider and machine look as if they were frozen in mid-air, make for an unusual picture.
When we’re accustomed to seeing subjects in motion, seeing them stopped in time can verge on the surreal.
- Capture unseen perspectives.
Some things are never seen in real life, except when viewed in a stop-action photograph. M.I.T’s Dr. Harold Edgerton captured a series of famed balloon burst images back in the 1930s that were only a starting point. Freeze a hummingbird in flight for a view of wings that never seem to stop. Or, capture the splashes as liquid falls into a bowl, as shown in Figure 1. No electronic flash was required for this image (and wouldn’t have illuminated the water in the bowl as evenly).
Instead, several high-intensity lamps and an ISO setting of 1600 allowed the camera to capture this image at 1/2,000th second.
- Vanquish camera shakes and gain new angles.
Here’s an idea that’s so obvious it isn’t always explored to its fullest extent. A high enough shutter speed can free you from the tyranny of a tripod, making it easier to capture new angles, or to shoot quickly while moving around, especially with longer lenses.
I tend to use a monopod or tripod for almost everything when I’m not using an image-stabilized lens, and I end up missing some shots because of a reluctance to adjust my camera support to get a higher, lower, or different angle. If you have enough light and can use an f/stop wide enough to permit a high shutter speed, you’ll find a new freedom to choose your shots.
I have a favored 170mm-500mm lens that I use for sports and wildlife photography, almost invariably with a tripod, as I don’t find the “reciprocal of the focal length” rule particularly helpful in most cases.
I would not handhold this hefty lens at its 500mm setting with a 1/500th second shutter speed under most circumstances. Nor, if you want to account for the crop factor, would I use 1/750th second. However, at 1/2,000th second or faster, it’s entirely possible for a steady hand to use this lens without a tripod or monopod’s extra support, and I’ve found that my whole approach to shooting animals and other elusive subjects changes in high-speed mode. Selective focus allows dramatically isolating my prey wide open at f/6.3, too.
 |
Figure 1: A large amount of artificial illumination and an ISO 1600 sensitivity setting allowed capturing this shot at 1/2,000th second without use of an electronic flash. |
Monday, July 2, 2012
Article: Autofocus Areas
Ordinarily, your camera would like to be able to choose among the available AF points itself. In fact, that’s the default behavior, and when AF-Area mode for Viewfinder is set to Auto-Area, the D3100 chooses the focus point automatically in Auto, No-Flash, Portrait, Landscape, Night Portrait, and PAS (Program, Aperture-priority, and Shutter-priority) exposure modes. Giving the D3100 free rein in selecting a focus point works well much of the time, and you can use this default mode with confidence.
If you want to choose a focus point yourself, you must do two things.
1- When the focus point is unlocked, you can use the multi selector pad to shift the active point to any of the 11 focus points seen in the viewfinder. The available points are shown in Figure 1. The currently active focus point is highlighted in red.
 |
| Figure 1: There are 11 possible focus points shown in the viewfinder. |
2- The second thing to do is to switch Focus Area mode in the Shooting menu from Autoarea (which always chooses the focus point automatically) to Single-point, Dynamic area, or 3D-tracking (11 Points). These modes change the D3100’s behavior as follows:
- Single-point.
You choose which of the 11 points are used, and the Nikon D3100 sticks with that focus bracket, no matter what.
"This mode is best for stationary subjects, and is used automatically in Close-up scene mode."
In this mode, you always select the focus point manually, using the multi selector button. The D3100 evaluates focus based solely on the point you select, making this a good choice for subjects that don’t move much.
- Dynamic-area.
You can select the focus point, but the D3100 can use other focus points as well.
"You’d want to use this mode when photographing subjects that are moving unpredictably, but want the flexibility of being able to choose one of the 11 focus zones yourself."
Once you’ve specified the focus bracket you want using the multi selector’s buttons, the D3100 will use that area exclusively in Single-servo autofocus mode (AF-S). If you’ve chosen Continuous-autofocus mode (AF-C) or Automatic-autofocus mode (AF-A), if the subject begins moving after autofocus is activated, the D3100 will focus based on information from one of the other focus zones.
Well suited for sports photography, this mode is applied automatically with the Sports scene setting, and can be used with other types of moving subjects, such as active children.
- Auto-area.
This default mode chooses the focus point for you, and can use distance information when working with a G or D lens that supplies that data to the camera.
- 3D-tracking (11 points).
In this mode, you select the focus point using the multi selector, but if you subsequently reframe the picture slightly, the D3100 uses distance information when in AF-C (Continuous Autofocus) or AF-A (Automatic Autofocus) modes to refocus on the original subject if necessary.
When using AFS (Single Autofocus), this mode functions the same as Single-point focus area mode.
"This mode is useful if you need to reframe a relatively static subject from time to time." If your subject leaves the frame entirely, you’ll need to release the shutter button and refocus.
Saturday, June 23, 2012
Article: Autofocus Modes
Choosing the right autofocus mode and the way in which focus points are selected is your key to success. Using the wrong mode for a particular type of photography can lead to a series of pictures that are all sharply focused—on the wrong subject.
There are two main autofocus options you need to master to make sure you get the best possible automatic focus with your Nikon D3100: Autofocus mode and Autofocus Area. I’ll explain each of them separately in different articles.
Autofocus Mode
--------------------
This choice determines when your D3100 starts to autofocus, and what it does when focus is achieved. Automatic focus is not something that happens all the time when your camera is turned on.
To save battery power, your D3100 generally doesn’t start to focus the lens until you partially depress the shutter release. (You can also use the AE-L/AFL button to start autofocus) Autofocus isn’t some mindless beast out there snapping your pictures in and out of focus with no feedback from you after you press that button. There are several settings you can modify that return at least a modicum of control to you.
Your first decision, if you’ll be composing your image through the optical viewfinder, should be whether you set the D3100 to AF-S, AF-C, AF-A, or Manual.
To change to any of the automatic focus modes, use the information edit menu and select the focus mode (AF is fifth from the bottom of the screen). With the camera set for one of the scene modes, AF-S will be used automatically, except when using the Sports/Action scene mode. To switch to manual mode, slide the AF/M or M-A/M switch on the lens to M.
AF-S
-----
In this mode, also called Single Autofocus, focus is set once and remains at that setting until the button is fully depressed, taking the picture, or until you release the shutter button without taking a shot. You can also use the AE-L/AF-L button, if you’ve set that button to lock focus when pressed.
For non-action photography, this setting is usually your best choice, as it minimizes out-of-focus pictures (at the expense of spontaneity).
The drawback here is that you might not be able to take a picture at all while the camera is seeking focus; you’re locked out until the autofocus mechanism is happy with the current setting. AF-S/Single Autofocus is sometimes referred to as focus priority for that reason. Because of the small delay while the camera zeroes in on correct focus, you might experience slightly more shutter lag. This mode uses less battery power.
When sharp focus is achieved, the focus confirmation light at the lower left will remain green, without flashing. By keeping the shutter button depressed halfway, you’ll find you can reframe the image while retaining the focus (and exposure) that’s been set.
AF-C
-----
This mode, also known as Continuous Autofocus, is the one to use for sports and other fast-moving subjects.
In this mode, once the shutter release is partially depressed, the camera sets the focus but continues to monitor the subject, so that if it moves or you move, the lens will be refocused to suit. Focus and exposure aren’t really locked until you press the shutter release down all the way to take the picture. You’ll often see Continuous Autofocus referred to as release priority.
If you press the shutter release down all the way while the system is refining focus, the camera will go ahead and take a picture, even if the image is slightly out of focus. You’ll find that AF-C produces the least amount of shutter lag of any autofocus mode: press the button and the camera fires. It also uses the most battery power, because the autofocus system operates as long as the shutter release button is partially depressed.
AF-A
-----
This setting is actually a combination of the first two. When selected, the camera focuses using AF-S AF and locks in the focus setting. But, if the subject begins moving, it will switch automatically to AF-C and change the focus to keep the subject sharp.
AF-A is a good choice when you’re shooting a mixture of action pictures and less dynamic shots and want to use AF-S when possible. The camera will default to that mode, yet switch automatically to AF-C when it would be useful for subjects that might begin moving unexpectedly. However, as with AF-S, the shutter can be released only when the subject at the selected focus point is in focus.
Manual Focus
----------------
In this mode, or when you’ve set the lens autofocus switch to Manual (or when you’re using a non AF-S lens, which lacks an internal autofocus motor), the D3100 always focuses manually using the rotating focus ring on the lens barrel.
However, if you are using a lens with a maximum aperture of at least f/5.6, the focus confirmation light in the viewfinder will glow a steady green when the image is correctly manually focused.
In manual focus mode, you can use the rangefinder feature to help you achieve sharp focus when you’re shooting in Program, Aperture-priority, or Shutter-priority mode. The rangefinder supplements the focus confirmation indicator at the left edge of the viewfinder by using the analog exposure indicator as a focusing “scale.”
In Figure 1, you can see that the focus indicator has illuminated all the bars to the right of the “zero” point. That means that the current focus is significantly behind the correct focus for the area in the red-highlighted focus point. To focus on the left-most battery, instead, you’d need to adjust the focus forward.
 |
| Figure 1: The manual focus scale in the viewfinder shows that the current focus is significantly behind the subject at the selected focus point (highlighted in red). Focus more closely. |
To summarize the instructions for using the rangefinder:
-----------------------------------------------------------------------
Turn the rangefinder On with this option if you want an additional manual focusing aid. With a manual focus lens and the rangefinder operating, the analog exposure display at bottom center in the viewfinder will be replaced by a rangefinder focusing scale. Indicators on the scale like those in Figure 2 show when the image is in sharp focus, as well as when you have focused somewhat in front of, or behind the subject.
Follow these steps to use the rangefinder:
- Activate. Use the Setup menu’s Rangefinder entry to turn on the rangefinder.
- Select a focus point. Use the multi selector to move the highlighting around in the frame.
- Rotate the lens focus ring. Zoom lenses will have two rings; there’s no fixed convention as to whether the wider or narrower ring is the focus ring. Choose the one farthest from the zoom scale.
- Watch the rangefinder. If the indicator is pointing towards the left, focus farther away. If the scale points towards the right, focus more closely.
- Achieve sharp focus. When the subject you’ve selected with the focus zone bracket is in sharp focus, only two bars will appear, centered under the 0, and the focus confirmation indicator will stop blinking. If no 0 appears, the camera cannot determine focus.
 |
| Figure 2: Upper left: Correct focus; Upper right: focus is grossly incorrect; Center left: focus slightly in front of the subject; Center right: focus slightly behind the subject; Bottom left: focus significantly in front of the subject; Bottom right: focus significantly behind the subject. |
Tuesday, June 12, 2012
Photo: Salah El Dien Citadel
 |
| Shoot Info: Photo taken with Nikon D3100. Mode: Manual. Exposure: 1/500 sec @ f/5. Focal length: 70mm (70.0-300.0mm Lens). ISO 400. Flash: Did not fire. Tripod: Yes. |
Sunday, June 10, 2012
Article: Using Autofocus with the Nikon D3100
Most non-dSLR digital cameras have sensors that are much tinier than the sensor in the D3100. Those smaller sensors require shorter focal lengths, which have, effectively, more depth-of-field.
The bottom line is that with the average point-and-shoot camera, everything is in focus from about one foot to infinity and at virtually every f/stop. Unless you’re shooting close-up photos a few inches from the camera, the depth-of-field is prodigious, and autofocus is almost a non-factor.
The D3100, on the other hand, uses longer focal length lenses to achieve the same field of view with its larger sensor, so there is less depth-of-field.
That’s a good thing, creatively, because you have the choice to use selective focus to isolate subjects. But it does make the correct use of autofocus more critical.
To maintain the most creative control, you have to choose three attributes:
- How much is in focus.
Generally, by choosing the f/stop used, you’ll determine the range of sharpness/amount of depth-of-field. The larger the DOF, the “easier” it is for the autofocus system’s locked-in focus point to be appropriate (even though, strictly speaking, there is only one actual plane of sharp focus). With less depth-of-field, the accuracy of the focus point becomes more critical, because even a small error will result in an out-of-focus shot.
- What subject is in focus?
The portion of your subject that is zeroed in for autofocus is determined by the autofocus zone that is active, and which is chosen either by you or by the Nikon D3100.
For example, when shooting portraits, it’s actually okay for part of the subject—or even part of the subject’s face—to be slightly out of focus as long as the eyes (or even just the nearest eye) appear sharp.
- When focus is applied.
For static shots of objects that aren’t moving, when focus is applied doesn’t matter much. But when you’re shooting sports, or birds in flight (see Figure 1), or children, the subject may move within the viewfinder as you’re framing the image. Whether that movement is across the frame or headed right towards you, timing the instant when autofocus is applied can be important.
 |
Figure 1: When capturing moving subjects, such as birds in flight, timing the instant when autofocus is applied can be important. |
Thursday, June 7, 2012
Photo: The Lonely Moon at Night
 |
| Shoot Info: Photo taken with Nikon D3100. Mode: Aperture Priority. Exposure: 1/250 sec @ f/11. Focal length: 300mm (70.0-300.0mm Lens). ISO 400. Flash: Did not fire. Tripod: Yes. |
Sunday, June 3, 2012
Article: Choosing the right Exposure Method - Aperture-Priority
But there are three semi-automated methods (plus manual) that you can use to choose the appropriate shutter speed and aperture. You can choose among them by rotating the mode dial until the one you want is selected. Your choice of which is best for a given shooting situation will depend on things like your need for lots of (or less) depth-of-field, a desire to freeze action or allow motion blur, or how much noise you find acceptable in an image. Each of the D3100’s exposure methods emphasizes one aspect of image capture or another.
Coming articles will explain and introduces you to all four methods.
Aperture-Priority
In A mode (don’t confuse this with Auto; some point-and-shoot cameras use the letter A to represent automatic mode), you specify the lens opening used, and the D3100 selects the shutter speed.
Aperture-priority is especially good when you want to use a particular lens opening to achieve a desired effect. Perhaps you’d like to use the smallest f/stop possible to maximize depth-of-field in a close-up picture. Or, you might want to use a large f/stop to throw everything except your main subject out of focus, as in Figure 1, a chilling portrait of a menacing lizard. Maybe you’d just like to “lock in” a particular f/stop because it’s the sharpest available aperture with that lens. Or, you might prefer to use, say, f/2.8 on a lens with a maximum aperture of f/1.4, because you want the best compromise between speed and sharpness.
Aperture-priority can even be used to specify a range of shutter speeds you want to use under varying lighting conditions, which seems almost contradictory. But think about it. You’re shooting a soccer game outdoors with a telephoto lens and want a relatively high shutter speed, but you don’t care if the speed changes a little should the sun duck behind a cloud.
 |
Figure 1: Use Aperture-priority to “lock in” a large f/stop when you want to blur the background |
Set your D3100 to A, and adjust the aperture until a shutter speed of, say, 1/1,000th second is selected at your current ISO setting. (In bright sunlight at ISO 400, that aperture is likely to be around f/11.) Then, go ahead and shoot, knowing that your D3100 will maintain that f/11 aperture (for sufficient depth-of-field as the soccer players move about the field), but will drop down to 1/750th or 1/500th second if necessary should the lighting change a little.
A Lo or Hi indicator in the viewfinder, accompanied by a Subject Is Too Dark or Subject Is Too Bright warning on the LCD indicates that the D3100 is unable to select an appropriate shutter speed at the selected aperture and that over- and underexposure will occur at the current ISO setting.
That’s the major pitfall of using A: you might select an f/stop that is too small or too large to allow an optimal exposure with the available shutter speeds.
For example, if you choose f/2.8 as your aperture and the illumination is quite bright (say, at the beach or in snow), even your camera’s fastest shutter speed might not be able to cut down the amount of light reaching the sensor to provide the right exposure. Or, if you select f/8 in a dimly lit room, you might find yourself shooting with a very slow shutter speed that can cause blurring from subject movement or camera shake.
Aperture-priority is best used by those with a bit of experience in choosing settings. Many seasoned photographers leave their D3100 set on A all the time.
Summary
As I said earlier, the best knowledge comes from experiment and experience. However, in general, if you want a blurred background, open up the lens aperture (small f-stop numbers) and get close to the focus object. To make the background sharp do just the opposite.
So when you want to create a softer, blurrier background in your photos, use a wider (lower) aperture value, switch to a longer lens, and get in close to your subject.
See also
1- Controlling Depth of Field (DOF).
2- Depth of Field: One of the most important elements in photography.
3- Book by David D. Busch (NIKON D3100 GUIDE TO DIGITAL SLR PHOTOGRAPHY).
Saturday, May 26, 2012
Article: Fine-Tuning Camera Exposure
Getting a Handle on Exposure
Exposure determines the look, feel, and tone of an image, in more ways than one. Incorrect exposure can impair even the best composed image by cloaking important tones in darkness, or by washing them out so they become featureless to the eye. On the other hand, correct exposure brings out the detail in the areas you want to picture, and provides the range of tones and colors you need to create the desired image.However, getting the perfect exposure can be tricky, because digital sensors can’t capture all the tones we are able to see. If the range of tones in an image is extensive, embracing both inky black shadows and bright highlights, the sensor may not be able to capture them all. Sometimes, we must settle for an exposure that renders most of those tones—but not all—in a way that best suits the photo we want to produce. You’ll often need to make choices about which details are important, and which are not, so that you can grab the tones that truly matter in your image. That’s part of the creativity you bring to bear in realizing your photographic vision.
For example, look at the two typical tourist snapshots presented side by side in Figure 1. The camera was mounted on a tripod for both, so the only way you can really see that they are two different images is by examining the differences in the way the water flows over the rocks.
However, the pair of pictures does vary in exposure. The version on the left was underexposed, which helps bring out detail in the ridges and sky in the background, but makes the water and foreground look murky and dark. The overexposed version on the right offers better exposure for the foreground area, but now the ridges and sky are too light.
 |
| Figure 1: At left, the image is exposed for the background highlights, losing shadow detail. At right, the exposure captures detail in the shadows, but the background highlights are washed out. |
With digital camera sensors, it’s tricky to capture detail in both highlights and shadows in a single image, because the number of tones, the dynamic range of the sensor, is limited. (The solution in this particular case was to combine the two photos using Photoshop.) For the image on the left, the camera calculated exposure based—mostly—on the subject matter in the background. The camera’s sensor simply can’t capture detail in both dark areas and bright areas in a single shot.
The solution, in this particular case, was to resort to a technique called High Dynamic Range (HDR) photography, in which the two exposures from Figure 1 were combined in an image editor such as Photoshop, or a specialized HDR tool like Photomatix (about $100 from www.hdrsoft.com). The resulting shot is shown in Figure 2. I’ll explain more about HDR photography later.
To understand exposure, you need to understand the six aspects of light that combine to produce an image. Start with a light source—the sun, an interior lamp, or the glow from a campfire—and trace its path to your camera, through the lens, and finally to the sensor that captures the illumination.
 |
| Figure 2: Combining the two exposures produces the best compromise image. |
Here’s a brief review of the things within our control that affect exposure.
- Light at its source.
Our eyes and our cameras are most sensitive to visible light. That light has several important aspects that are relevant to photography, such as color, and harshness (which is determined primarily by the apparent size of the light source as it illuminates a subject). But, in terms of exposure, the important attribute of a light source is its intensity. We may have direct control over intensity, as might be the case with an interior light. Or, we might have only indirect control over intensity, as with sunlight, which can be made to appear dimmer by introducing translucent light-absorbing or reflective materials in its path.
- Light's duration
We tend to think of most light sources as continuous. But, as you’ll learn, the duration of light can change quickly enough to modify the exposure, as when the main illumination in a photograph comes from an intermittent source, such as an electronic flash.
- Light reflected, transmitted, or emitted.
Once light is produced by its source, either continuously or in a brief burst, we are able to see and photograph objects by the light that is reflected from our subjects towards the camera lens; transmitted (say, from translucent objects that are lit from behind); or emitted (by a candle or television screen). When more or less light reaches the lens from the subject, we need to adjust the exposure. This part of the equation is under our control to the extent we can increase the amount of light falling on or passing through the subject (by adding extra light sources or using reflectors), or by pumping up the light that’s emitted (by increasing the brightness of the glowing object).
- Light passed by the lens.
Not all the illumination that reaches the front of the lens makes it all the way through. Filters can remove some of the light before it enters the lens. Inside the lens barrel is a variable-sized diaphragm called an aperture that dilates and contracts, producing a variable-sized aperture to control the amount of light that passes through the lens. You, or your camera auto exposure system, can control exposure by varying the size of the aperture. The relative size of the aperture is called the f/stop.
- Light passing through the shutter. Once lightpasses through the lens, the amount of time the sensor receives it is determined by camera shutter, which can remain open for as long as 30 seconds (or even longer if you use the Bulb setting) or as briefly as 1/4,000th second.
- Light captured by the sensor.
Not all the light falling onto the sensor is captured. If the number of photons reaching a particular photo site doesn’t pass a set threshold, no information is recorded. Similarly, if too much light illuminates a pixel in the sensor, then the excess isn’t recorded or, worse, spills over to contaminate adjacent pixels. We can modify the number of pixels that contribute to image detail by adjusting the ISO setting. At higher ISOs, the incoming light is amplified to boost the effective sensitivity of the sensor.
These factors—the quantity of light produced by the light source; the amount reflected or transmitted towards the camera; the light passed by the lens; the amount of time the shutter is open; and the sensitivity of the sensor—all work proportionately and reciprocally to produce an exposure.
That is, if you double the amount of light that’s available, increase the aperture by one stop, make the shutter speed twice as long, or boost the ISO setting 2X, you’ll get twice as much exposure. Similarly, you can increase any of these factors while decreasing one of the others by a similar amount to keep the same exposure.
F/STOPS AND SHUTTER SPEEDS
If you’re really new to more advanced cameras, you might need to know that the lens aperture, or f/stop, is a ratio, much like a fraction, which is why f/2 is larger than f/4, just as 1/2 is larger than 1/4. However, f/2 is actually four times as large as f/4. (If you remember your high school geometry, you’ll know that to double the area of a circle, you multiply its diameter by the square root of two: 1.4.)
Lenses are usually marked with intermediate f/stops that represent a size that’s twice as much/half as much as the previous aperture. So, a lens might be marked: f/2, f/2.8, f/4, f/5.6, f/8, f/11, f/16, f/22, with each larger number representing an aperture that admits half as much light as the one before, as shown in Figure 3.
Shutter speeds are actual fractions (of a second), but the numerator is omitted, so that 60, 125, 250, 500, 1,000, and so forth represent 1/60th, 1/125th, 1/250th, 1/500th, and 1/1,000th second. To avoid confusion, Nikon uses quotation marks to signify longer exposures: 2", 2"5, 4", and so forth represent 2.0, 2.5, and 4.0 second exposures, respectively.
 |
| Figure 3: Top row (left to right): f/2, f/2.8, and f/4; bottom row, f/5.6, f/8, f11. |
Most commonly, exposure settings are made using the aperture and shutter speed, followed by adjusting the ISO sensitivity if it’s not possible to get the preferred exposure (that is, the one that uses the “best” f/stop or shutter speed for the depth-of-field or action-stopping we want). Table 1 shows equivalent exposure settings using various shutter speeds and f/stops.
Table 1: Equivalent Exposures |
|||
Shutter speed |
f/stop |
Shutter speed |
f/stop |
| 1/30th second | f/22 | 1/500th second | f/5.6 |
| 1/60th second | f/16 | 1/1000th second | f/4 |
| 1/125th second | f/11 | 1/2000th second | f/2.8 |
| 1/250th second | f/8 | 1/4000th second | f/2 |
When the D3100 is set for P mode, the metering system selects the correct exposure for you automatically, but you can change quickly to an equivalent exposure by holding down the shutter release button halfway (“locking” the current exposure), and then spinning the command dial until the desired equivalent exposure combination is displayed.
Rotate the dial to the right to increase the size of the aperture and make the shutter speed faster (for less depth-of-field/more action-stopping power) or to the left to use smaller apertures and slower shutter speeds (to increase depth-of-field while potentially adding some blur from subject or camera motion). Nikon calls this ability Flexible Programming and the camera displays a star-like symbol adjacent to the P indicator that lets you know it is in effect.
In Aperture-priority (A) and Shutter-priority (S) modes, you can change to an equivalent exposure, but only by adjusting either the aperture (the camera chooses the shutter speed) or shutter speed (the camera selects the aperture). I’ll cover all these exposure modes later in another post.
Friday, May 11, 2012
Article: Set the correct white balance for your shoot
Most people don’t even notice that light has different color characteristics because the human eye automatically adjusts to different color temperatures—so quickly, in fact, that everything looks correct in a matter of milliseconds.
When color film ruled the world, photographers would select which film to use depending on what their light source was going to be. The most common film was balanced for daylight, but you could also buy film that was color balanced for tungsten light sources. Most other lighting situations had to be handled by using color filters over the lens. This process was necessary for the photographer’s final image to show the correct color balance of a scene.
Your camera has the ability to perform this same process automatically, but you can also choose to override it and set it manually. Guess which method we are going to use? That’s right, once again your photography should be all about maintaining control over everything that influences your final image.
Luckily, you don’t need to have a deep understanding of color temperatures to control your camera’s white balance. The choices are given to you in terms that are easy to relate to and that will make things pretty simple. Your white balance choices are:
- Auto: The default setting for your camera. It is also the setting used by all of the automatic scene modes.
- Daylight: Most often used for general daylight/sun-lit shooting.
- Shade: Used when working in shaded areas that are still using sunlight as the dominant light source.
- Cloudy: The choice for overcast or very cloudy days. This and the Shade setting will eliminate the blue color cast from your images.
- Incandescent: Used for any occasion where you are using regular household-type bulbs for your light source. Tungsten is a very warm light source and will result in a yellow/orange cast if you don’t correct for it.
- Cool-White Fluorescent: Used to get rid of the green-blue cast that can result from using regular fluorescent lights as your dominant light source. Some fluorescent lights are actually balanced for daylight, which would allow you to use the Daylight white balance setting.
- Flash: Used whenever you’re using the built-in flash or a flash on the hot shoe. You should select this white balance to adjust for the slightly cooler light that comes from using a flash. (The hot shoe is the small bracket located on the top of your camera, which rests just above the eyepiece. This bracket is used for attaching a more powerful flash to the camera).
- Pre: Indicates that you are using a customized white balance that is adjusted for a particular light source. This option can be adjusted using an existing photo you have taken or by taking a picture of something white or gray in the scene.
Friday, May 4, 2012
Article: The value of image histogram in cameras
Simply put, histograms are two-dimensional representations of your images in graph form.
There are two different histograms that you should be concerned with: the luminance and the color histograms. Luminance is referred to in your manual as “brightness” and is most valuable when evaluating your exposures. In Figure 1.1, you see what looks like a mountain range.
 |
| FIGURE 1.1 This is a typical histogram, where the dark to light tones run from left to right. The black-towhite gradient above the graph demonstrates where the tones lie on the graph and would not appear above your camera histogram display. |
The graph represents the entire tonal range that your camera can capture, from the whitest whites to the blackest blacks. The left side represents black, all the way to the right side, which represents white. The heights of the peaks represent the number of pixels that contain those luminance levels (a tall peak in the middle means your image contains a large amount of medium-bright pixels).
Looking at this figure, it is hard to determine where all of the ranges of light and dark areas are and how much of each I have. If I look at the histogram, I can see that the largest peak of the graph is in the middle and trails off as it reaches the edges. In most cases, you would look for this type of histogram, indicating that you captured the entire range of tones, from dark to light, in your image. Knowing that is fine, but here is where the information really gets useful.
When you evaluate the histogram that has a spike or peak riding up the far left or right side of the graph, it means that you are clipping detail from your image. In essence, you are trying to record values that are either too dark or too light for your sensor to accurately record. This is usually an indication of over- or underexposure. It also means that you need to correct your exposure so that the important details will not record as solid black or white pixels (which is what happens when clipping occurs). There are times, however, when some clipping is acceptable.
If you are photographing a scene where the sun will be in the frame, you can expect to get some clipping because the sun is just too bright to hold any detail. Likewise, if you are shooting something that has true blacks in it—think coal in a mineshaft at midnight—there are most certainly going to be some true blacks with no detail in your shot.
 | ||
| FIGURE 1.2 This image is about two stops underexposed. Notice the histogram is skewed to the left. |
The main goal is to ensure that you aren’t clipping any “important” visual information,and that is achieved by keeping an eye on your histogram. Take a look at Figure 1.2.
 |
| FIGURE 1.3 This histogram reflects a correctly exposed image. |
The histogram displayed on the image shows a heavy skew toward the left with almost no part of the mountain touching the right side. This is a good example of what an underexposed image histogram looks like. Now look at Figure 1.3 and compare the histogram for the image that was correctly exposed. Notice that even though there are two distinct peaks on the graph, there is an even distribution across the entire histogram.